Hello! I built my blog with Jekyll, a static site generator, and this is a simple tutorial on how to set it up. If you don’t know Git and Github pages, here’s a pretty good site to get you started! I like to use the terminal, so everything’s done in command–line.
Basically, we need to:
- Create a github page
- Set up Jekyll
- Add HTTPS to our site (Won’t be touching on it in this post)
1. Create a github page
- Create a github repository, with the repo name as username.github.io (mine’s huiwenhw.github.io)
- Clone the repository on your local machine
$ git clone https://github.com/username/username.github.io - cd into the repo folder & create a index.html file (which is the default page for your site)
$ cd username.github.io $ echo "Hello World" > index.html - Add, commit & push your “Hello World”!
$ git add --all $ git commit -m "Initial commit" $ git push -u origin master - Head on to http://yourusername.github.io! You’ll see a ‘Hello World’ printed on the page.
2. Set up Jekyll
Jekyll is a static site generator. Simply put, static site generators takes the content we give it & outputs it on the screen. There’s no dynamic interaction such as requesting for files etc. and is really useful for simple sites like a blog. If you’re interested to know more, you can take a look here.
To install jekyll, do:
# Install Jekyll and Bundler gems through RubyGems
$ gem install jekyll bundler

# Create a new Jekyll site at ./mysite
$ jekyll new mysite

# cd into our new directory
$ cd mysite

# Build the site & serve it. This will serve our site at localhost:4000. Hop on over to see the generated site!
/mysite $ bundle exec jekyll serve
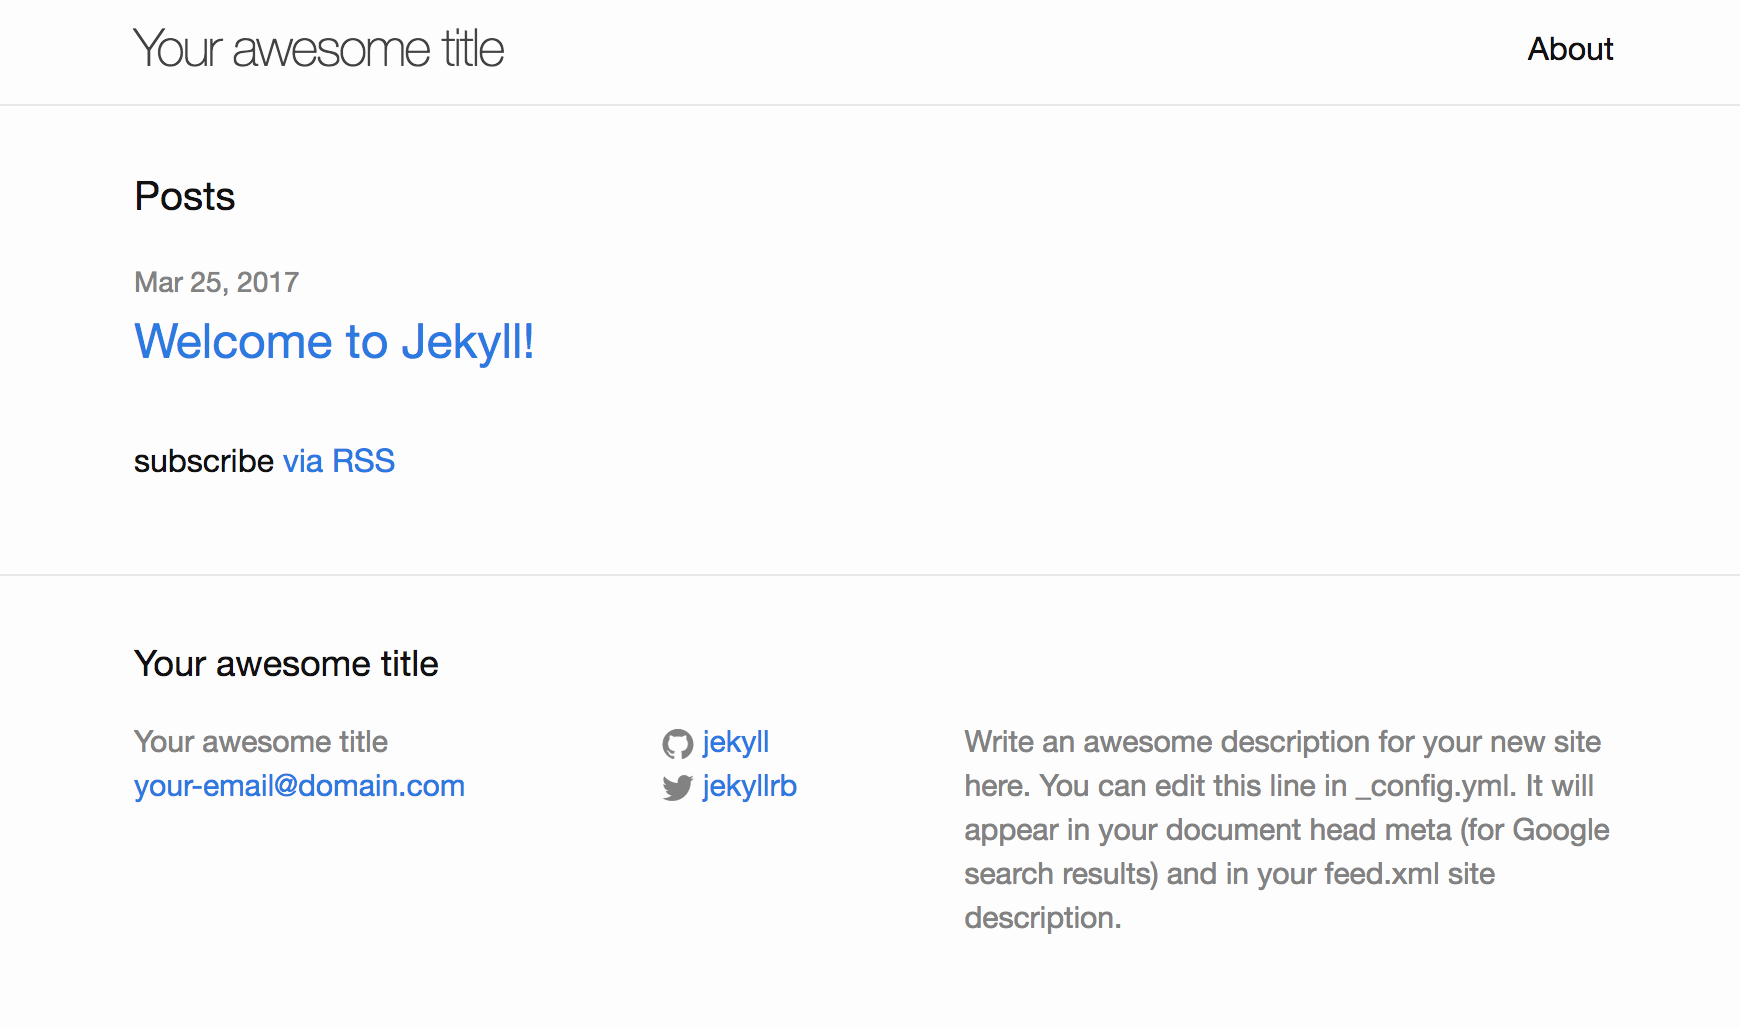
Your newly generated site will look something like this:
After that’s done, this is what you’ll see in your directory:
$ ls
$ Gemfile, _config.yml, _site, index.md, Gemfile.lock, _posts, about.md
Jekyll follows a directory structure, such as the one shown below, so its good to get to know what’s going on before we get started.
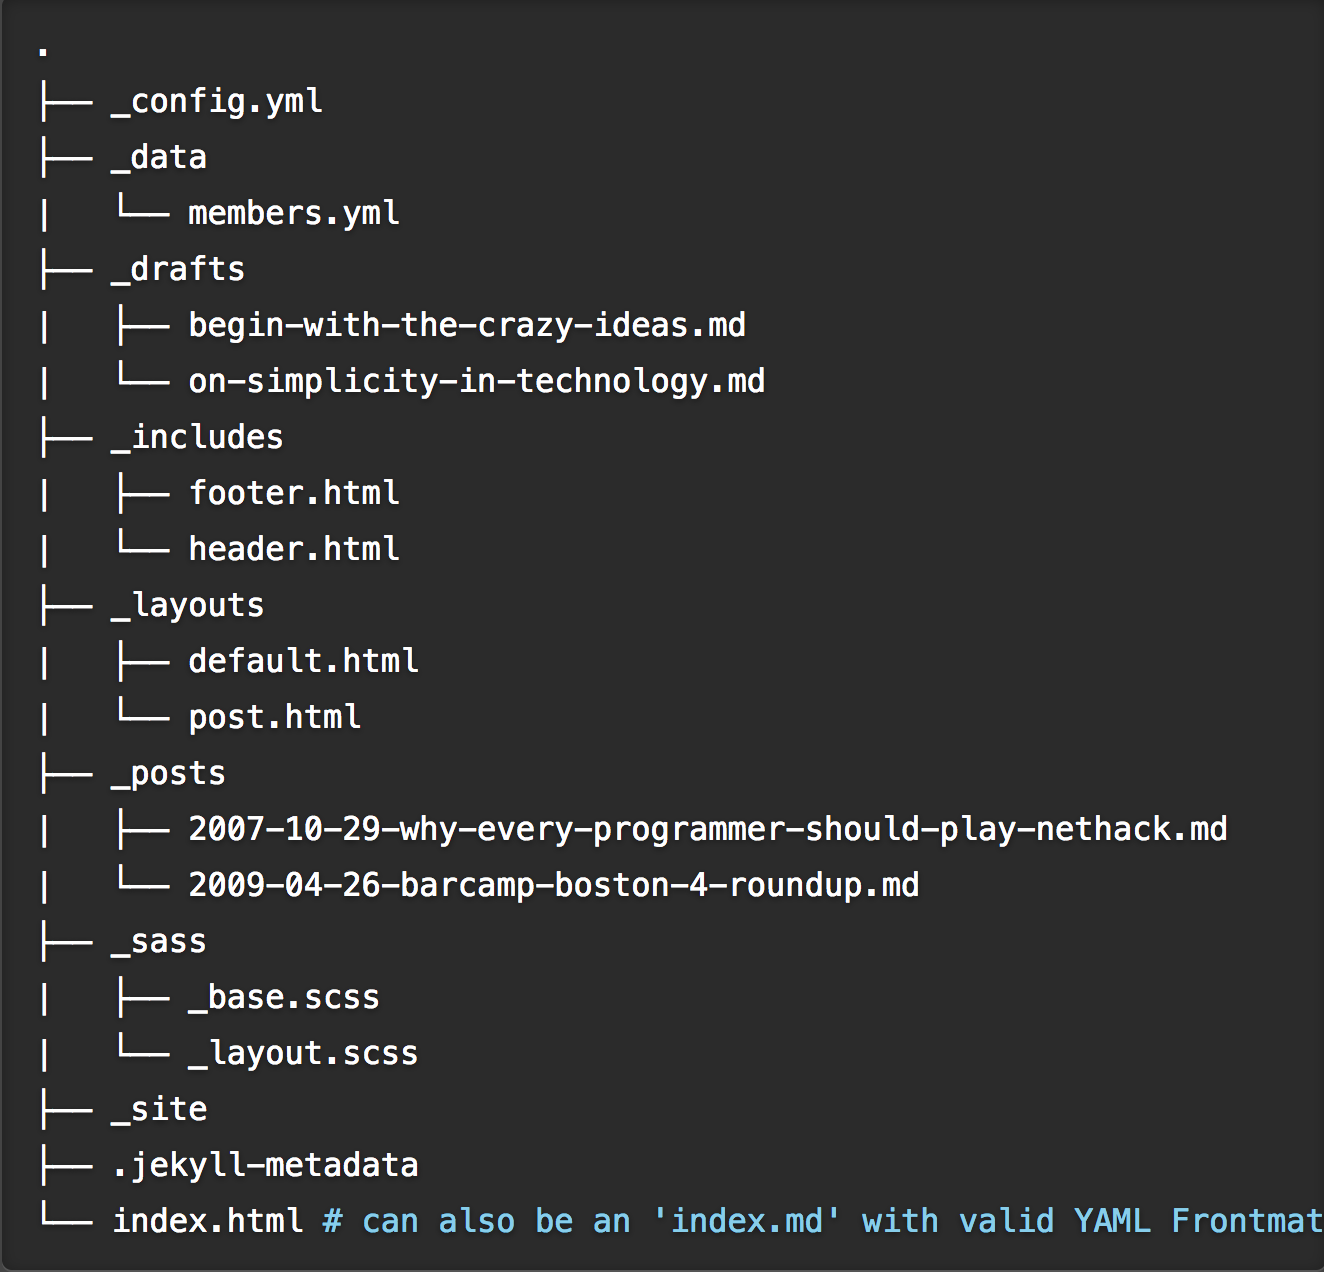
Rough idea on the various directories:
- _drafts: Contains posts which we do not want to post / show on our site yet
- _includes: The partials that we can use in our layout
- _layouts: Consists of the templates that wrap posts
- _posts: The content of our page! Format has to be in: YEAR-MONTH-DAY-title.md/html/whateveryoulike
- _sass: Sass partials that can be imported to main.scss while will be processed into main.css for our site
- _site: Folder where our generated site will be stored! Don’t touch this folder
- index.html: Where our template for the index page goes
Okay, now that we roughly know where our stuffs should go, its time to start building the structure. I didn’t really like the template that jekyll had, so I created my own template & styles. The first thing we wanna do is to create the base template for our site. Soo let’s create a _layouts folder and add a default.html file inside. You can name the file anything you like!
In this file, write the template you want for your home page. I’ll put a simple example below:
(_layouts/defaults.html)
<!DOCTYPE html>
<html>
<head>
	<title>Huiwen</title>
</head>
<body>
	<div class="main-container">
		{'{ content }}
	</div>
</body>
</html>
Now, we have a default layout that we can use on every page! yay! What does this mean? It means we can now include this (which is also called the front matter):
---
layout: default
---
in our index.html and it will render the layout we had in _layouts/default.html. If you named the file something else, then just replace ‘default’ with that name. Whatever content that you put below the front matter will be rendered into the content tags (i.e. the { } curly brackets) that we wrote in _layouts/defaults.html.
The next thing we can do is to show all the posts that we have written. A simple loop such as the one below will work: (Ignore the ‘ in the code. I had to do that to stop the code from running LOL)
---
layout: default
---
<ul>
	{'% for post in site.posts %}
		<li>
			<'a href="{'{ post.url }}">{'{ post.title }}</a>
		</li>
	{'% endfor %}
</ul>
Now we have a simple working page hosted on github that displays a list of posts we have! YAY! There’re many other useful stuffs such as the link tag, which allows you to link to a post, page or file in your project! Aaaand that’s about it! Head over to the jekyll docs to explore more features. It was really useful when I was setting up my page.
♡, Hui Wen